rabbitmq 生产者端消息确认机制
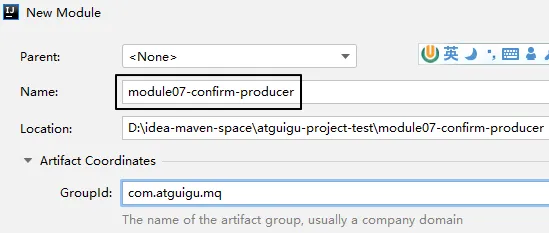
一、创建module
二、搭建环境
1、配置POM
<parent>    <groupId>org.springframework.boot</groupId>    <artifactId>spring-boot-starter-parent</artifactId>    <version>3.1.5</version></parent>
<dependencies>    <dependency>        <groupId>org.springframework.boot</groupId>        <artifactId>spring-boot-starter-amqp</artifactId>    </dependency>    <dependency>        <groupId>org.springframework.boot</groupId>        <artifactId>spring-boot-starter-test</artifactId>    </dependency>    <dependency>        <groupId>org.projectlombok</groupId>        <artifactId>lombok</artifactId>    </dependency></dependencies>
2、主启动类
没有特殊设定:
package com.atguigu.mq;
import org.springframework.boot.SpringApplication;import org.springframework.boot.autoconfigure.SpringBootApplication;
@SpringBootApplicationpublic class RabbitMQProducerMainType {
    public static void main(String[] args) {        SpringApplication.run(RabbitMQProducerMainType.class, args);    }
}
3、YAML
注意:publisher-confirm-type和publisher-returns是两个必须要增加的配置,如果没有则本节功能不生效
spring: rabbitmq: host: 192.168.200.100 port: 5672 username: guest password: 123456 virtual-host: / publisher-confirm-type: CORRELATED # 交换机的确认 publisher-returns: true # 队列的确认logging: level: com.atguigu.mq.config.MQProducerAckConfig: info三、创建配置类
1、目标
在这里我们为什么要创建这个配置类呢?首先,我们需要声明回调函数来接收RabbitMQ服务器返回的确认信息:
| 方法名 | 方法功能 | 所属接口 | 接口所属类 |
|---|---|---|---|
| confirm() | 确认消息是否发送到交换机 | ConfirmCallback | RabbitTemplate |
| returnedMessage() | 确认消息是否发送到队列 | ReturnsCallback | RabbitTemplate |
然后,就是对RabbitTemplate的功能进行增强,因为回调函数所在对象必须设置到RabbitTemplate对象中才能生效。
原本RabbitTemplate对象并没有生产者端消息确认的功能,要给它设置对应的组件才可以。
而设置对应的组件,需要调用RabbitTemplate对象下面两个方法:
| 设置组件调用的方法 | 所需对象类型 |
|---|---|
| setConfirmCallback() | ConfirmCallback接口类型 |
| setReturnCallback() | ReturnCallback接口类型 |
2、API说明
①ConfirmCallback接口
这是RabbitTemplate内部的一个接口,源代码如下:
  /**   * A callback for publisher confirmations.   *   */  @FunctionalInterface  public interface ConfirmCallback {
    /**     * Confirmation callback.     * @param correlationData correlation data for the callback.     * @param ack true for ack, false for nack     * @param cause An optional cause, for nack, when available, otherwise null.     */    void confirm(@Nullable CorrelationData correlationData, boolean ack, @Nullable String cause);
  }
生产者端发送消息之后,回调confirm()方法
- ack参数值为true:表示消息成功发送到了交换机
- ack参数值为false:表示消息没有发送到交换机
②ReturnCallback接口
同样也RabbitTemplate内部的一个接口,源代码如下:
  /**   * A callback for returned messages.   *   * @since 2.3   */  @FunctionalInterface  public interface ReturnsCallback {
    /**     * Returned message callback.     * @param returned the returned message and metadata.     */    void returnedMessage(ReturnedMessage returned);
}注意:接口中的returnedMessage()方法仅在消息没有发送到队列时调用
ReturnedMessage类中主要属性含义如下:
| 属性名 | 类型 | 含义 |
|---|---|---|
| message | org.springframework.amqp.core.Message | 消息以及消息相关数据 |
| replyCode | int | 应答码,类似于HTTP响应状态码 |
| replyText | String | 应答码说明 |
| exchange | String | 交换机名称 |
| routingKey | String | 路由键名称 |
3、配置类代码
①要点1
加@Component注解,加入IOC容器
②要点2
配置类自身实现ConfirmCallback、ReturnCallback这两个接口,然后通过this指针把配置类的对象设置到RabbitTemplate对象中。
操作封装到了一个专门的void init()方法中。
为了保证这个void init()方法在应用启动时被调用,我们使用@PostConstruct注解来修饰这个方法。
关于@PostConstruct注解大家可以参照以下说明:
@PostConstruct注解是Java中的一个标准注解,它用于指定在对象创建之后立即执行的方法。当使用依赖注入(如Spring框架)或者其他方式创建对象时,@PostConstruct注解可以确保在对象完全初始化之后,执行相应的方法。
使用@PostConstruct注解的方法必须满足以下条件:
- 方法不能有任何参数。
- 方法必须是非静态的。
- 方法不能返回任何值。
当容器实例化一个带有@PostConstruct注解的Bean时,它会在调用构造函数之后,并在依赖注入完成之前调用被@PostConstruct注解标记的方法。这样,我们可以在该方法中进行一些初始化操作,比如读取配置文件、建立数据库连接等。
③代码
有了以上说明,下面我们就可以展示配置类的整体代码:
package com.atguigu.mq.config;
import jakarta.annotation.PostConstruct;import lombok.extern.slf4j.Slf4j;import org.springframework.amqp.core.ReturnedMessage;import org.springframework.amqp.rabbit.connection.CorrelationData;import org.springframework.amqp.rabbit.core.RabbitTemplate;import org.springframework.beans.factory.annotation.Autowired;import org.springframework.stereotype.Component;
@Component@Slf4jpublic class MQProducerAckConfig implements RabbitTemplate.ConfirmCallback, RabbitTemplate.ReturnsCallback{
    @Autowired    private RabbitTemplate rabbitTemplate;
    @PostConstruct    public void init() {        rabbitTemplate.setConfirmCallback(this);        rabbitTemplate.setReturnsCallback(this);    }
    @Override    public void confirm(CorrelationData correlationData, boolean ack, String cause) {        if (ack) {            log.info("消息发送到交换机成功!数据:" + correlationData);        } else {            log.info("消息发送到交换机失败!数据:" + correlationData + " 原因:" + cause);        }    }
    @Override    public void returnedMessage(ReturnedMessage returned) {        log.info("消息主体: " + new String(returned.getMessage().getBody()));        log.info("应答码: " + returned.getReplyCode());        log.info("描述:" + returned.getReplyText());        log.info("消息使用的交换器 exchange : " + returned.getExchange());        log.info("消息使用的路由键 routing : " + returned.getRoutingKey());    }}
四、发送消息
package com.atguigu.mq.test;
import org.junit.jupiter.api.Test;import org.springframework.amqp.rabbit.core.RabbitTemplate;import org.springframework.beans.factory.annotation.Autowired;import org.springframework.boot.test.context.SpringBootTest;
@SpringBootTestpublic class RabbitMQTest {
    public static final String EXCHANGE_DIRECT = "exchange.direct.order";    public static final String ROUTING_KEY = "order";
    @Autowired    private RabbitTemplate rabbitTemplate;
    @Test    public void testSendMessage() {        rabbitTemplate.convertAndSend(                EXCHANGE_DIRECT,                ROUTING_KEY,                "Hello atguigu");    }
}
通过调整代码,测试如下三种情况:
- 交换机正确、路由键正确
- 交换机正确、路由键不正确,无法发送到队列
- 交换机不正确,无法发送到交换机
rabbitmq 生产者端消息确认机制
本文链接: https://oxai.net.cn/posts/ac5dca4a
本文采用 知识共享署名-非商业性使用-相同方式共享 4.0 国际许可协议 进行许可。
留言评论